Keeping an Eye on Your Azure Costs in Under 2 Minutes
Using cloud services provides various conveniences. One of which is the transparent auto-scaling of the infrastructure. Especially with the event-driven architecture approaches, we enjoy deeper sleep during the night while our app and the underlying platform flex their muscles to serve our customers. I bet you are implementing all the security measures that come to the top of your backlog. Here is one thing I would suggest you do; monitor your costs as closely as you can 😊
You can’t imagine how many of us forget to set up the proper alerting mechanisms for our cloud subscription consumption. Here is how to do it in Azure in under 2 minutes.
⚠️ The solution in this post works with Enterprise Agreement, Microsoft Customer Agreement, and Web direct/Pay-As-You-Go subscriptions. If you have a subscription through a Cloud Solution Provider (CSP), you will need to ask them to set up your budget. Here is the document they can follow.
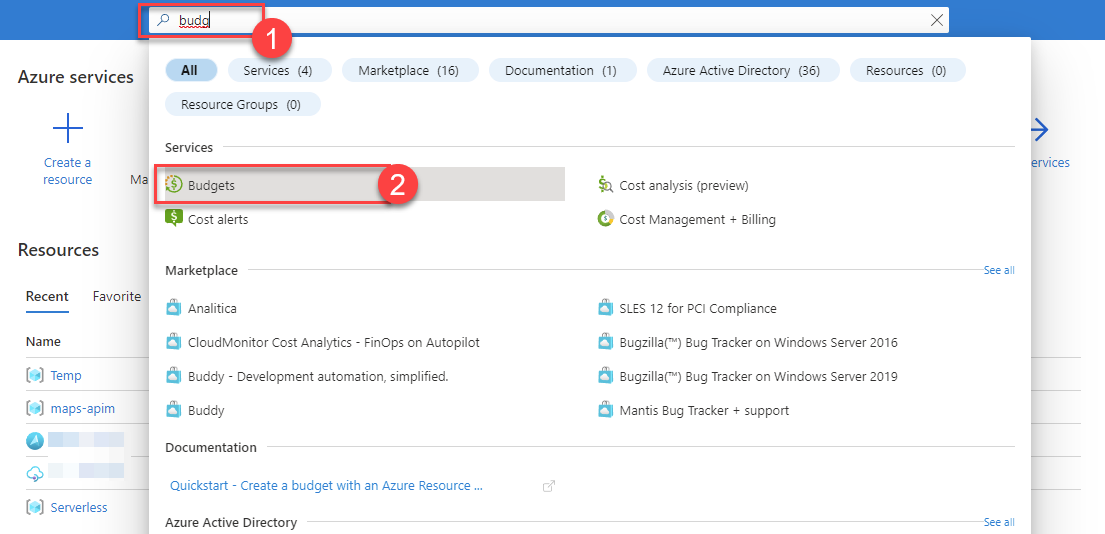
Open your Azure Portal and search for Budgets (2) in the search box (1). Once found, select the Budgets (2) item to proceed.
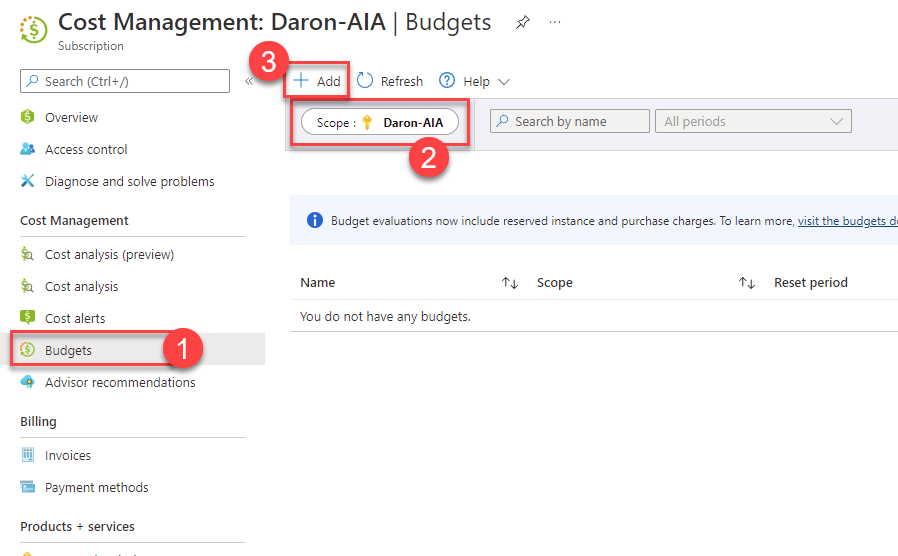
Once you have the Budgets (1) panel open, ensure the proper subscription is selected (2). Next, select +Add (3) to create a new budget alert for your subscription. Keep in mind that a budget alert is just an alert. It will not stop your subscription and your workloads in any case.
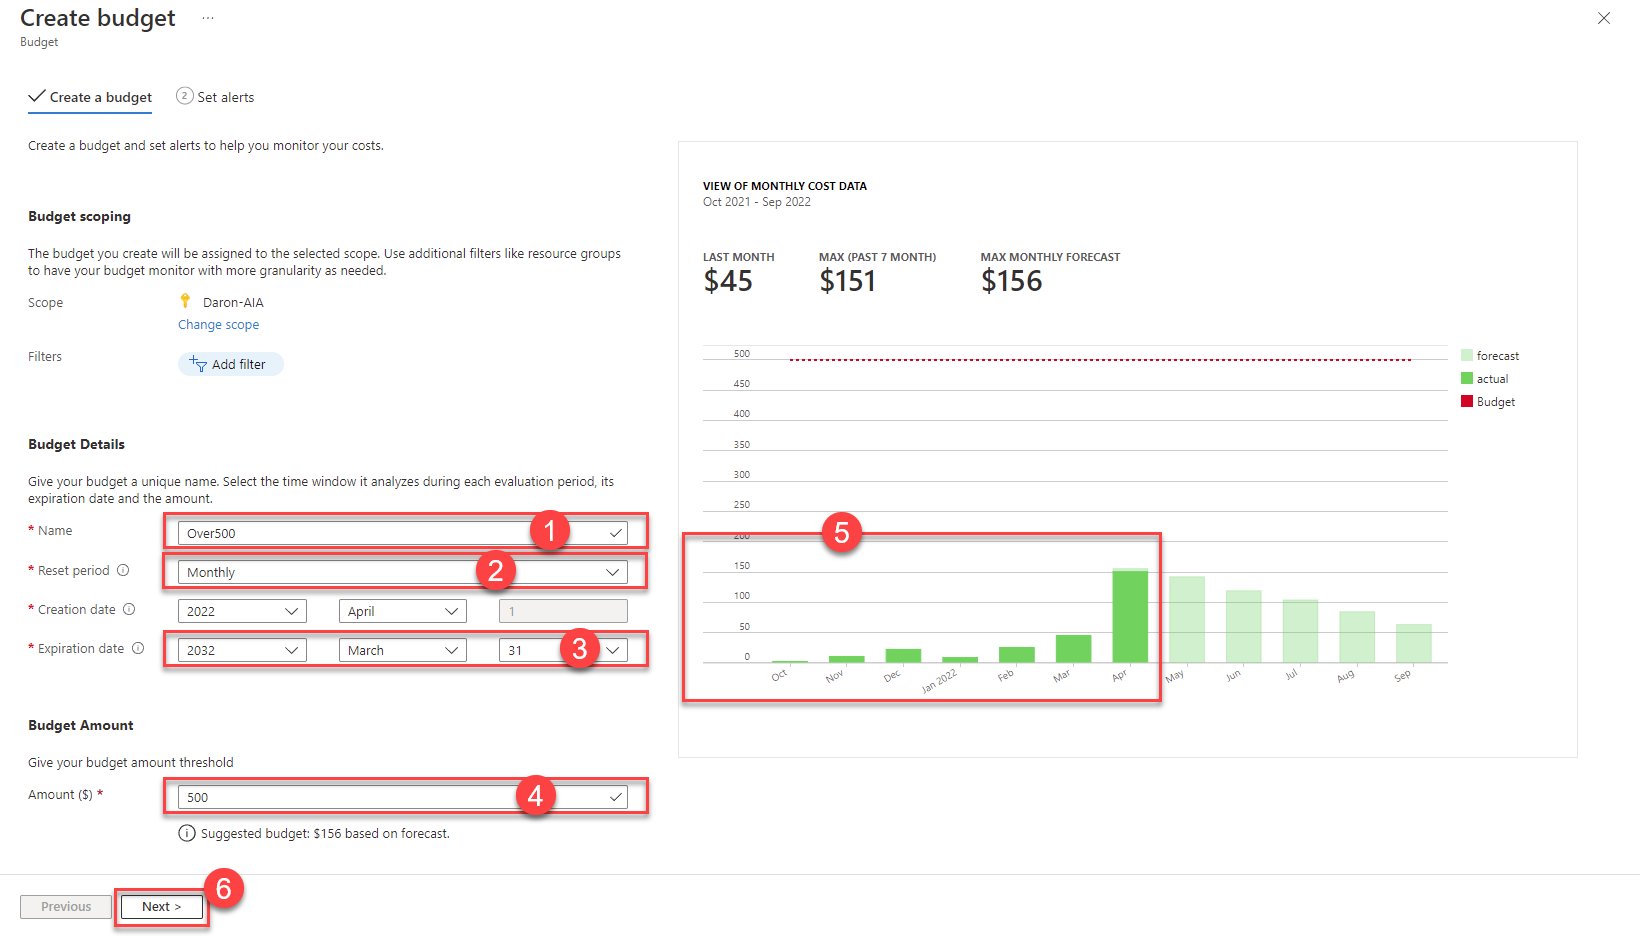
When on the create budget page, provide an identification name (1) for your budget. You can select a reset period for the budget. We will choose a monthly (2) budget in this case. We will need to set an expiration date for the budget when alerting will stop. Feel free to select the date based on your needs. In my case, I picked the furthest date possible (3). Keep in mind that expired budgets will be deleted in 24 hours. Finally, set the amount for the budget (4). You can use the consumption graph on the right (5) to look at your past consumption data and future forecast to set the proper budget for your subscription. A 500$ limit is good for my development subscription. Select Next (6) to proceed.
Now it is time to set up the actual alerting rules. We have two types of alerts. An Actual alert is triggered when consumption reaches the matching amount. A Forecasted alert is activated when consumption is forecasted to get the amount at any point during the reset period. In my case, I will have three Actual triggers for different budget percentages and a Forecasted (1) for the entire budget. Once alert rules are ready, the final step is to provide the list of e-mails (2) to be notified. Alternatively, you can set up action groups (4) if you want to trigger an external API for further event processing. When ready, select Create (3) to finish creating the budget.

You are done! Now, whatever happens, you will have a low-level alert of your Azure subscription costs if anything else fails. Good job 😉
Resources
Daron Yondem advises senior technology leaders on AI-driven organizational transformation. Learn more →