Hidden Gem: Teams Live Events
With the current COVID-19 “stay-at-home” circumstances, online meeting and collaboration tools are in high demand. Things get trickier if you start looking for a tool where you can invite thousands of people. It is not that there are no solutions; it is just the setup of your environment that might be a little complicated.
I started looking for an easy way out, wondering if the tools that I already have and paying for can help me. Here are my requirements;
- I do not want to create additional costs.
- I want to be able to host up to 1500 people.
- I’m not willing to set up encoder software etc. Preferably use what I already use, or something that wouldn’t take more than 5 minutes to set up.
The first stop was Zoom. Unfortunately, they had a 300 participant limit on the tier we were using in our organization. I could spend an additional amount to get more participants in, but I didn’t want to.
The second stop was Microsoft’s Teams. We have Office 365 E5. Apparently, it has a feature called “Live Events” that I had no idea they ever existed. A regular Teams meeting can accommodate up to 250 participants, but a live event can host 10.000 attendees! The underlying platform for Live Events is pretty robust thanks to Azure Media Services and Azure CDN. You can have multiple presenters, multiple desktop sharing sessions, split-screen if needed, and that is included in your Office 365 subscription if you have E1, E3, E5, or A3, A5 subscription. In my case, we had E5, but if you are wondering what’s the cheapest option E1 8$/month, and A3 for academic is 2.5$/month with an annual commitment.
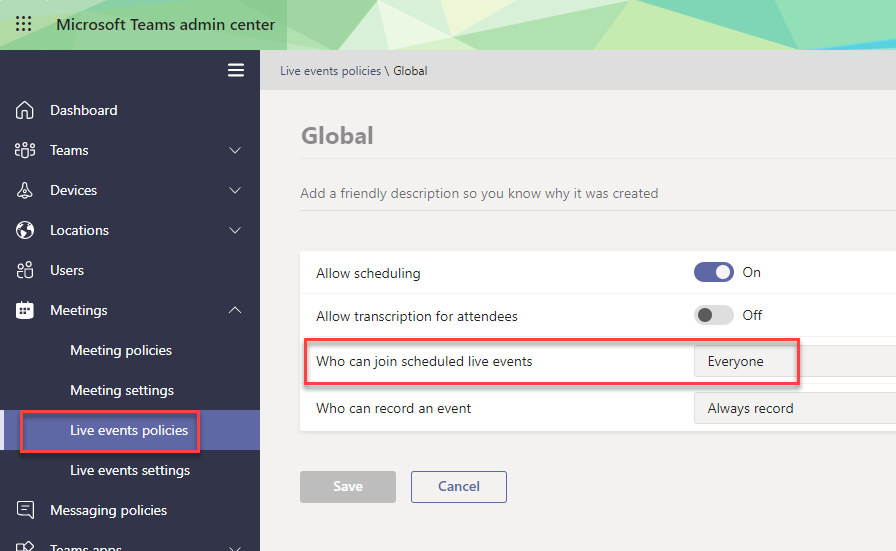
If everything goes well, it looks like I have a solution I can use. However, my first try to set up a live public event didn’t work out. The “public” option in Teams was disabled. After some research, I figured “public” events have to enabled as part of the organization’s policy. You have to visit https://admin.teams.microsoft.com/ and change live event policies to allow members of your organization to create live events with public attendance. Keep in mind that you might need to wait for about 30 minutes for the configuration to propagate.
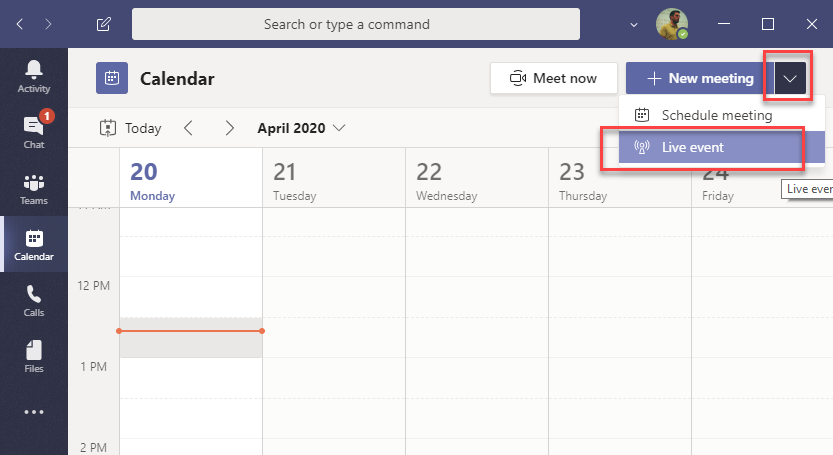
Once the configuration is done, it is time to go to the Teams Calendar and click the down-pointing arrow to discover the live event option.
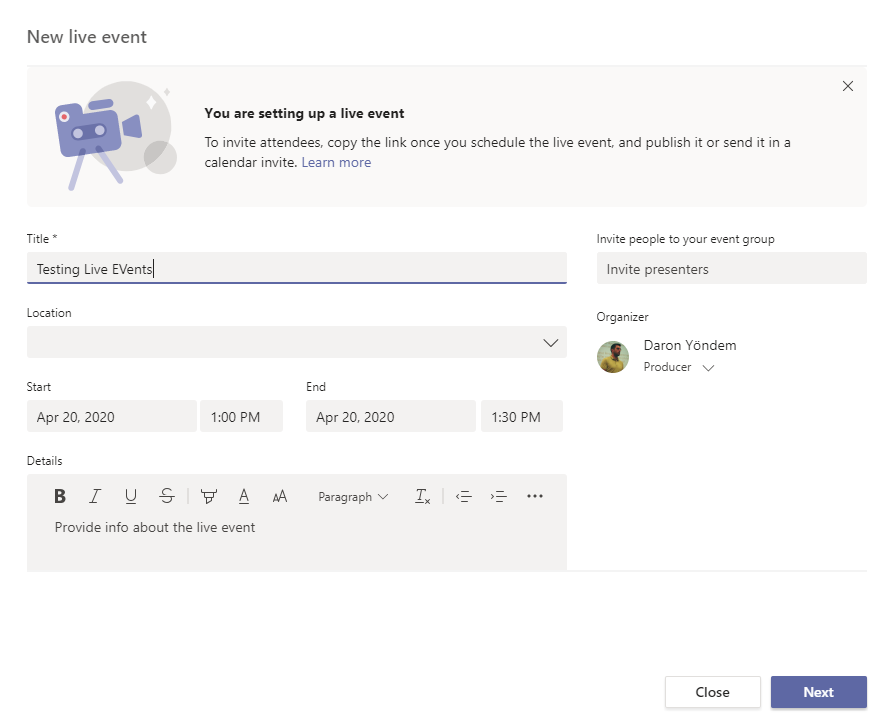
Give your event a name. Include all presenters you want to include.
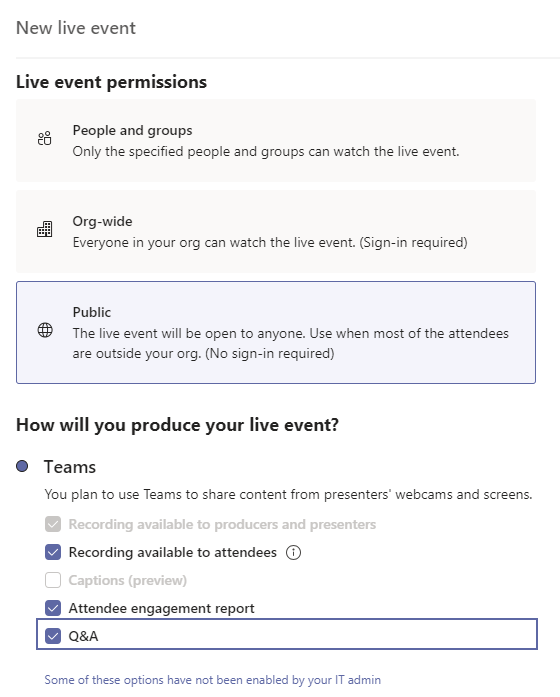
The next step is where we set out event public and enable QA if you are up to it.
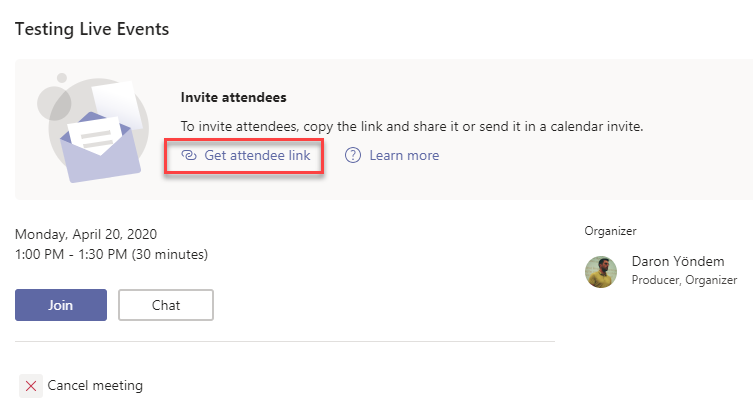
Finally, you have an invite you can share with anyone. People can now join your event from their browser, with no download requirements and no signups.
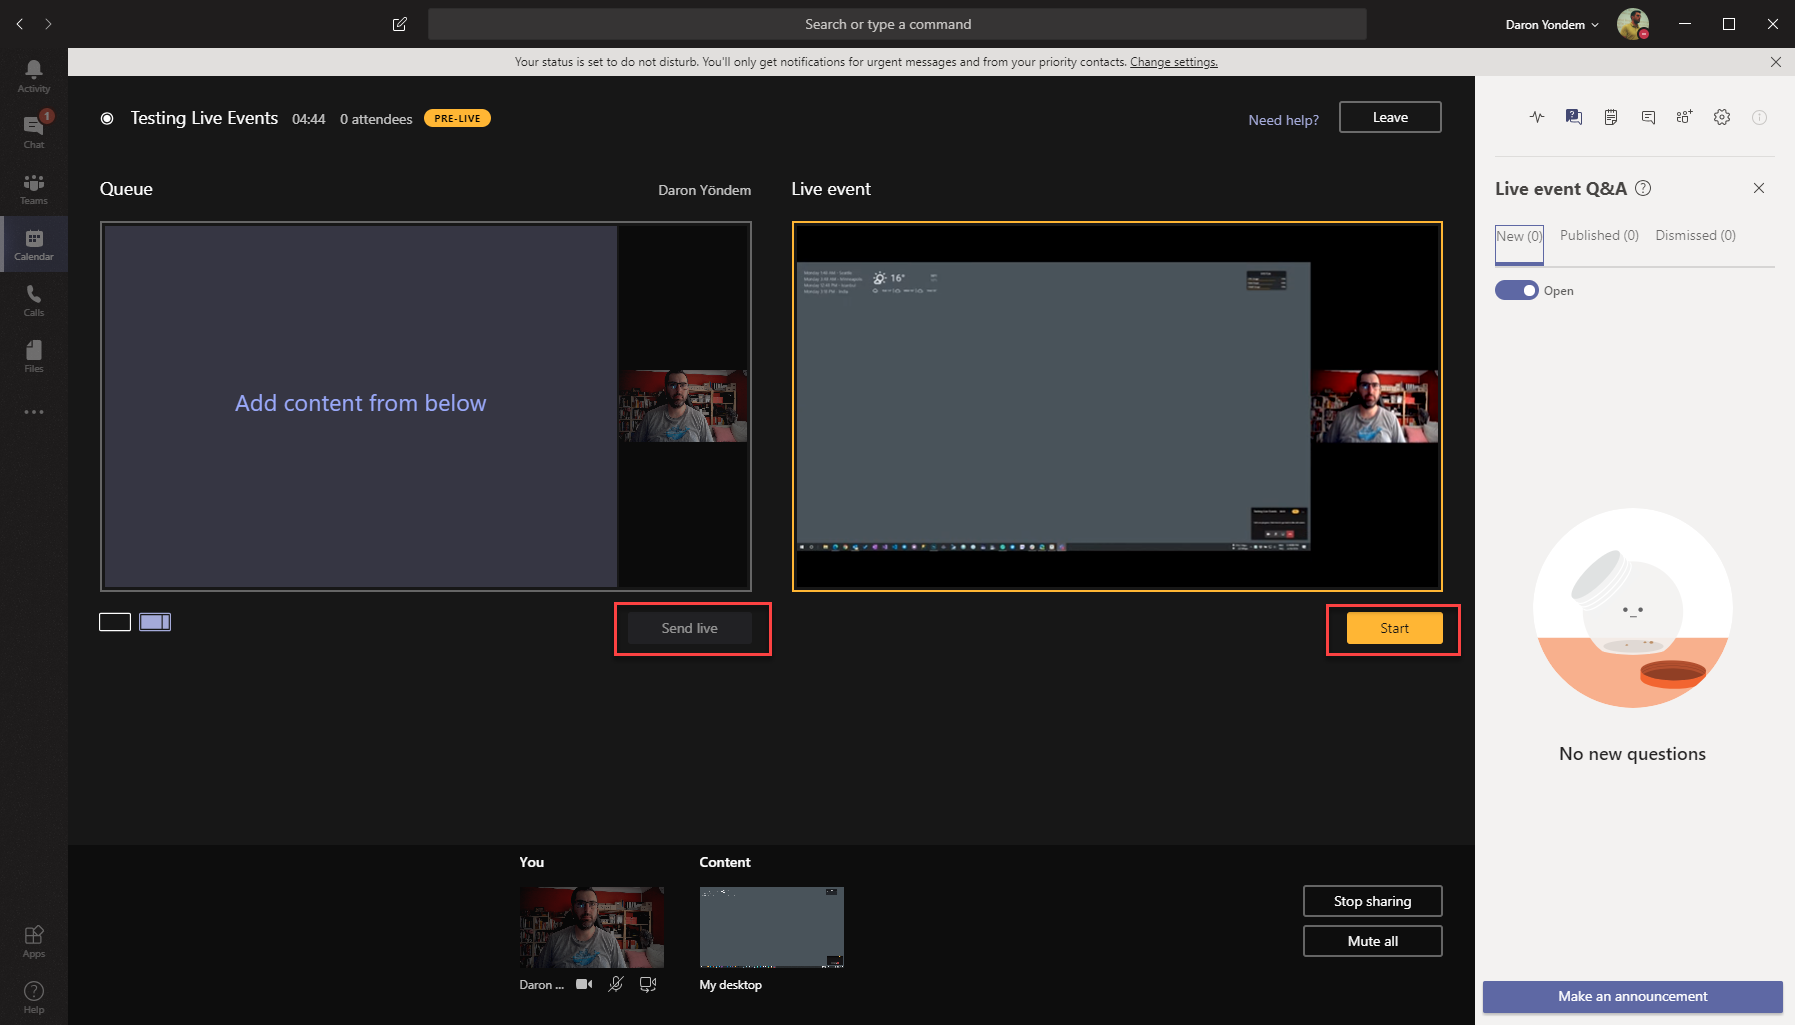
On your end, as a broadcaster, you will use the Teams client to publish content. On the left of your screen, you pick the template and queue up the content you want to push live next. After selecting “Send live” the material goes to the right panel that shows your live stream. Of course, to start the event, you have to select “Start” :) On the bottom of the screen, you can see all the content shared by all participants. That gives you the ability to queue what content has to come next and switch when needed.
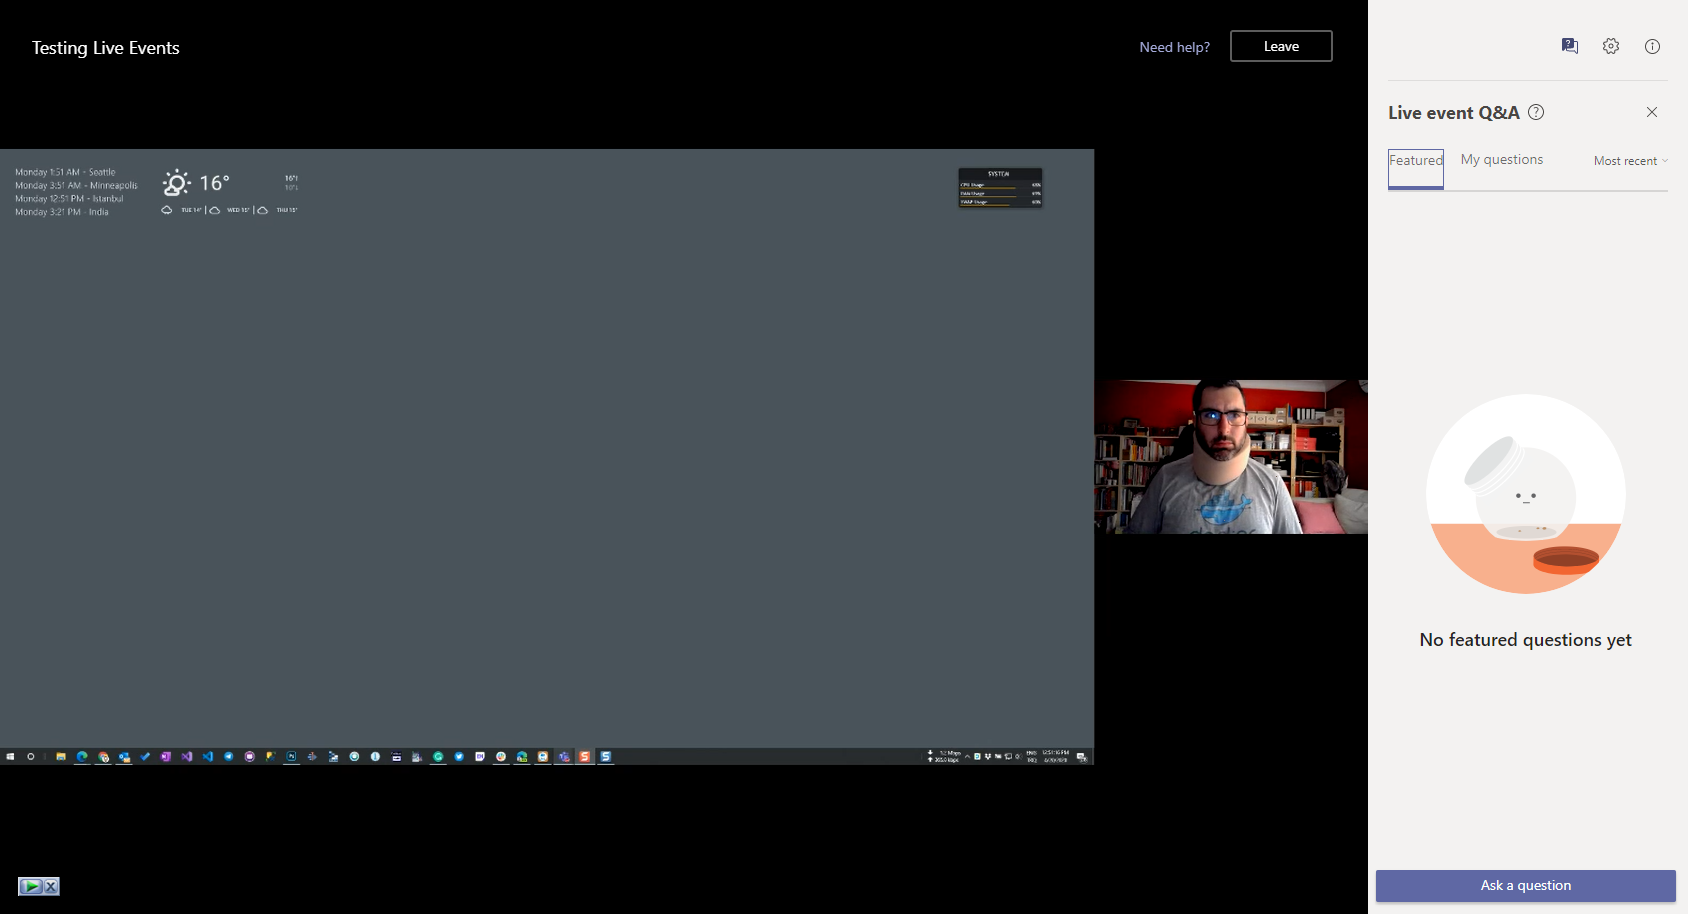
The participant’s view is pretty simple too. They see the content and get a Q&A panel if you enabled it. The presenter view has a Q&A panel as well. You can answer questions and publish them for everyone to see if you want to. Otherwise, the question and the answer stay as a secret between you and the attendee.
That is all! As easy as it goes. In my case, I was not aware that there was such a thing called Teams live events, that we were already paying for :) and wanted to share.
Stay safe!
Daron Yondem advises senior technology leaders on AI-driven organizational transformation. Learn more →